Now that the hardware for my ESXi Server is ready (see previous post), it is now time to install ESXi 4 to the USB stick inside the server.
Note: Some of you who are very observant will notice that I am re-using some of the screenshots from my ESXi 4 install on VMware Fusion. I only did so as the screens are exactly the same and I would using be repeating with photos instead.
How To Install ESXi 4 on a USB Stick
1) Download VMware ESXi 4 from www.vmware.com. You will need to register first.
2) Burn the VMware ESXi 4 iso to a CD.
3) Insert the CD, and boot your pc ensuring that it will boot from the CD first. You may need to enter the bios to make this change, or you may see an option to temporarily boot from an alternate device on startup.
4) Once ESXi starts to boot from the CD, you will see the initial Boot Menu. Don't do anything as the default option is what we want.
5) ESXi Server is initializing. No need to do anything.
6) Press Enter on the Welcome screen.
7) Press F11 to accept the License Agreement.
8) Choose the USB device and press Enter.
9) Press Enter to Confirm Disk Selection.
10) Press F11 to Confirm Install.
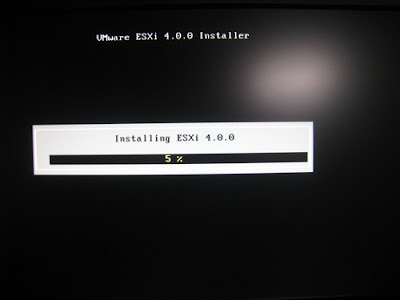
12) You will see the install in progress.
13) The installation is complete. Press Enter to Reboot.
14) Once the reboot is complete. you will see the ESXi main screen. You will notice that the host has a DHCP address. Press F2 to customize system.
15) Select Configure Password and press Enter.
16) Enter password and press Enter.
17) I recommend changing the dhcp address to a static as you will need to access this server later.
18) You are now ready to access your ESXi server remotely!
Related Posts:
Part 1 The Time Has Come
Part 2 Running ESXi on VMware Fusion
Part 3 Building My ESXi Server
Part 4 Installing ESXi 4 on a USB Stick
Part 5 Installing vSphere Client on Windows
Part 6 Updating ESXi using vSphere Host Update Utility
Part 7 Browsing the VMware ESXi Datastore
Part 8 WinSCP to the Rescue
Part 9 Creating a VM
Part 10 Downloading a Virtual Machine
***Updated March 26th 2010
I have decided to continue the series with at least the following:
Part 11 Running vSphere Client from Ubuntu
Part 12 Running vSphere Client from Mac OS
Part 13 Adding/Removing a VM to ESXi
Part 14 Export in ESXi
Part 15 Deploying OVF Templates
Part 16 Adding a License Key
Subscribe to:
Post Comments (Atom)


No comments:
Post a Comment