How To Install ESXi 4 on VMware Fusion 3
1) Download VMware ESXi 4 from www.vmware.com. You will need to register first.
2) From the VMware Fusion toolbar, select File > New
3) Click Continue without disc
4) Select Use operating system installation disc image file and then navigate to the VMware ESX i 4 file, then click Continue
5) Choose VMware ESX as the Operating System and ESX Server 4.0 as the version, and then click Continue.
6) Click Finish.
7) You can optionally change the name. Click Save.
8) Change Settings. You will need to decide how large the disk size should be. The default is 40GB. Any other VMs you create inside this ESXi server will draw from this storage pool (unless you build a simulated SAN). As I am only experimenting with this install, I decided to create a tiny ESXi server. I also assumed I could add additional this as required to this ESXi server. Fyi, I also changed the networking to Bridged.
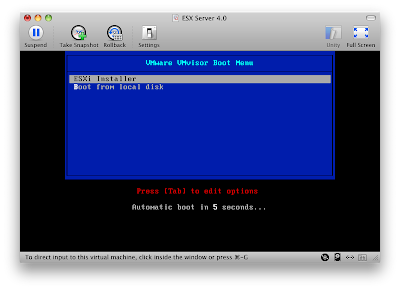
9) Start the VM. Below you will see the first screen and do not need to do anything as the default is ok.
10) ESXi Server is initializing. No need to do anything.
11) Press Enter on the Welcome screen.
12) Press F11 to accept the License Agreement. To simulate the F11 key, go to the VMware Menu > Virtual Machine > Send Key > F11.
13) Press Enter to select the disk to install to.
14) Press F11 to Confirm Install.
15) You will see the ESXi install in progress.
16) The installation is complete. Press Enter to reboot.
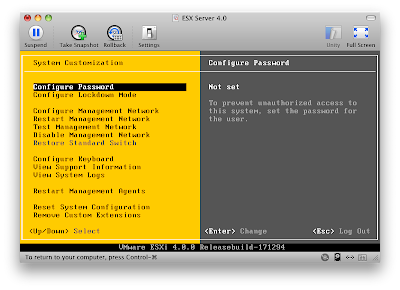
17) Once the reboot is complete, you will see the ESXi main screen. You will notice that the host has a DHCP address. Press F2 to customize system.
18) Select Configure Password.
19) Enter password and press Enter.
20) I recommend changing the dhcp address to a static as you will need to access this server later.
21) You are now ready to access your ESXi server remotely.
Related Posts:
Part 1 The Time Has Come
Part 2 Running ESXi on VMware Fusion
Part 3 Building My ESXi Server
Part 4 Installing ESXi 4 on a USB Stick
Part 5 Installing vSphere Client on Windows
Part 6 Updating ESXi using vSphere Host Update Utility
Part 7 Browsing the VMware ESXi Datastore
Part 8 WinSCP to the Rescue
Part 9 Creating a VM
Part 10 Downloading a Virtual Machine
***Updated March 26th 2010
I have decided to continue the series with at least the following:
PPart 11 Running vSphere Client from Ubuntu
Part 12 Running vSphere Client from Mac OS
Part 13 Adding/Removing a VM to ESXi
Part 14 Export in ESXi
Part 15 Deploying OVF Templates
Part 16 Adding a License Key


No comments:
Post a Comment