I previously covered how to remote desktop back into Windows in my post Remote Desktop - Part 2 Getting Back to Windows. Now I want to show you how to connect using Windows Remote Desktop Web Connection.
The basic steps are:
1) Install Remote Desktop Web Connection
2) Configure Internet Information Services (IIS)
3) Enable Remote Desktop
4) Configure Windows XP firewall
5) Connect to an Enabled Remote Desktop Web Connection
Step 1. Install Remote Desktop Web Connection
1) Go to Control Panel and open Add or Remove Programs.
2) Click Add/Remove Windows Components.
3) Select Internet Information Services, and then click Details.
4) Select World Wide Web Service, and then click Details.
5) Select Remote Desktop Web Connection, and then click OK.
6) Click OK to close Subcomponents of Internet Information Services (IIS) window.
7) Click Next in the Windows Components Wizard window
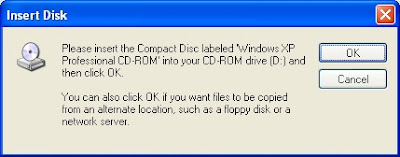
8) The install starts and shortly after you may be prompted for the XP CD. Click OK and either insert the cd or point to where the files can be found to allow the install to complete.
9) Click Finish.
Step 2. Configure Internet Information Services (IIS)
1) Go to Control Panel > Administrative Tools > Internet Information Services. Note depending on your view, the path may be Control Panel > Performance and Maintenance > Administrative Tools > Internet Information
2) Expand your local computer, expand Web Sites, expand Default Web Site. You should now see a folder called tsweb.
3) Right-click the tsweb folder and then click Properties.
4) Click the Directory Security tab. Click the Edit button in Anonymous access and authentication control.
5) Check the Anonymous access check box on the Authentication Methods dialog box, and then click OK.
6) Click OK to close the tsweb Properties window.
7) Right-click the Default Web Site and then click Properties. As port 80 is a highly-used port and may be used by other software installed on your computer, I recommend changed it to some value between 1000 to 65535. I chose 1234. Change the TCP Port and click OK.
9) If your Default Web Site is Stopped, right-click and then click Start.
Step 3. Enable Remote Desktop
To Enable Remote Desktop to a Windows XP Professional system,
1) Click Start.
2) Right-click My Computer, choose Properties.
3) Select Remote tab.
4) Select the checkbox Allow users to connect remotely to this computer.
5) Click on Select Remote Users. Confirm that the user you want to remote login with.
Step 4. Configure Windows XP firewall
As I used a non-standard TCP port 1234 for the remote desktop web connection, I will also need to configure the firewall on XP.
1) Go to Control Panel > Windows Firewall. Note depending on your view, the path may be Control Panel > Security Center > Windows Firewall.
2) As you can see, the firewall is on. Click on the Exceptions tab.
3) Although, the Remote Desktop service is checked, it is configured for port 3389. You can select the Remote Desktop service and click Edit to confirm.
4) Click Add Port.
5) For the Name, enter Remote Desktop Web Connection. For the Port number, enter 1234. Click OK.
6) The Remote Desktop Web Connection port has now been added
7) Click OK.
Step 5. Connect to an Enabled Remote Desktop Web Connection
To connect to a computer supporting remote desktop web connection
1) Start Internet Explorer and enter http://[ip address]:port/tsweb. In my example I set up remote desktop web connection on my computer call main that has an ip address of 192.168.1.91. The port I configured above was 1234. The url would then be http://main:1234/tsweb or http://192.168.1.91:1234/tsweb.
2) You may notice a prompt at the top of your screen to install Terminal Services ActiveX Client. Click to start the install.
3) You should now see the Remote Desktop Web Connection Window. Enter ip address of the computer you are connecting to and click Connect.
4) You will get a warning message. Click Connect.
5) Enter your User name and Password and click OK.
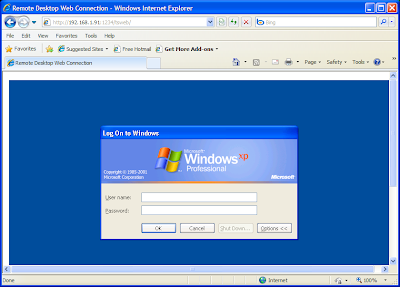
6) You should now see your remote desktop!
Subscribe to:
Post Comments (Atom)


You might comment on the order system of the blog. You should chat it's splendid. Your blog audit would swell up your visitors. I was very pleased to find this site.I wanted to thank you for this great read!! remote ssh
ReplyDelete